
Hi, Guys!
Haven’t checked in for a while; just wanted to say hello and tell you about some minor upgrades and maintenance on the AZUB TRIcon.
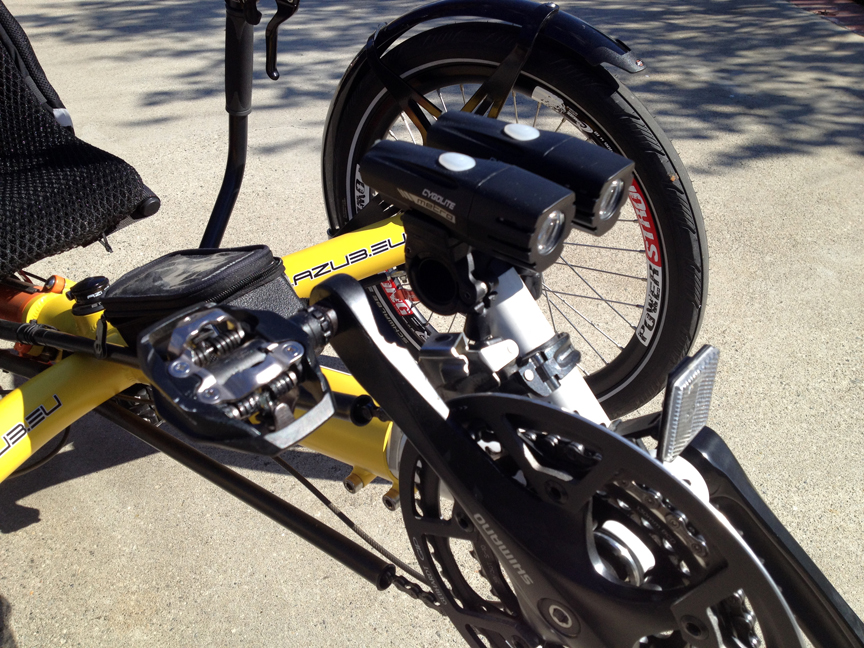
I switched out my front two headlights. I now have two “Metro” units by Cygolite. Man, are they bright. One of the six possible modes called “Daylightening” flashes or pulses with 500 lumens of light. It truly is like lightening. The manufacturer recommends this mode only for daytime riding. I can see why; it’s impossible to miss those strobes. Another mode called “Steady Pulse” is also a flashing type mode, but the lights do not go completely out during the cycle, they only dim slightly. Even that mode is 360 lumens bright.
Even on the lowest possible setting, night time riding is a breeze. I have to make sure I don’t point them too high into the eyes of oncoming motorist. The mounting system is familiar and allows me to literally point each light in any direction. Plus, the locking device guarantees the lights will never come off until you want them to. I had a problem with that when using the previous lights.
Bottom line: I love them. The best part is that they are USB rechargeable. I can attach them to any regular USB charger for a few hours or even to my USB computer port and they are good to go. On low setting they can shine for 12 hours. If I use only one that means I can have light for 24 hours before recharging. On the dimmest setting with two lights shining, I can’t believe the amount of light they make. Awesome!
New lights and pedals.
I also switched the pedals to Shimano M530 SPD units. These are clipped on both sides instead of only one like the previous M324 SPD units were. I figured that I’m never really going to ride the TRIcon without being clipped in, so why not just switch to pedals with clips on both sides. That way I won’t have to fumble, turning the pedals before I can get locked in. I’m not sure why but the new pedals seem to support the bottom of my biking shoes better. I have not had any hot spots on my feet, even after hours of fairly heavy pedaling.
Maybe it’s because there is an extension on the forward side of the clip, which the M324s don’t have. I’m not sure; it just seems like more the bottom of my shoe is engaged. Anyway, I like them. I moved the older units to my TREK 700 hybrid, which I ride to work several times a week.
Also I did a bit of maintenance today. I purchased a Park Tool Hyperglide Lockring Tool (FR-5), a chain whip, and a gear cleaning brush to remove and scrub/polish up the rear cluster and derailleur. The lock-ring that holds the chain rings in place has a grooved surface that bites into the matching surface on the smallest gear. You can see the grooves on the top surface of the smallest gear in the picture. It made an unnerving grinding sound when I loosened it. It sounded as if I had broken something, but all was well.
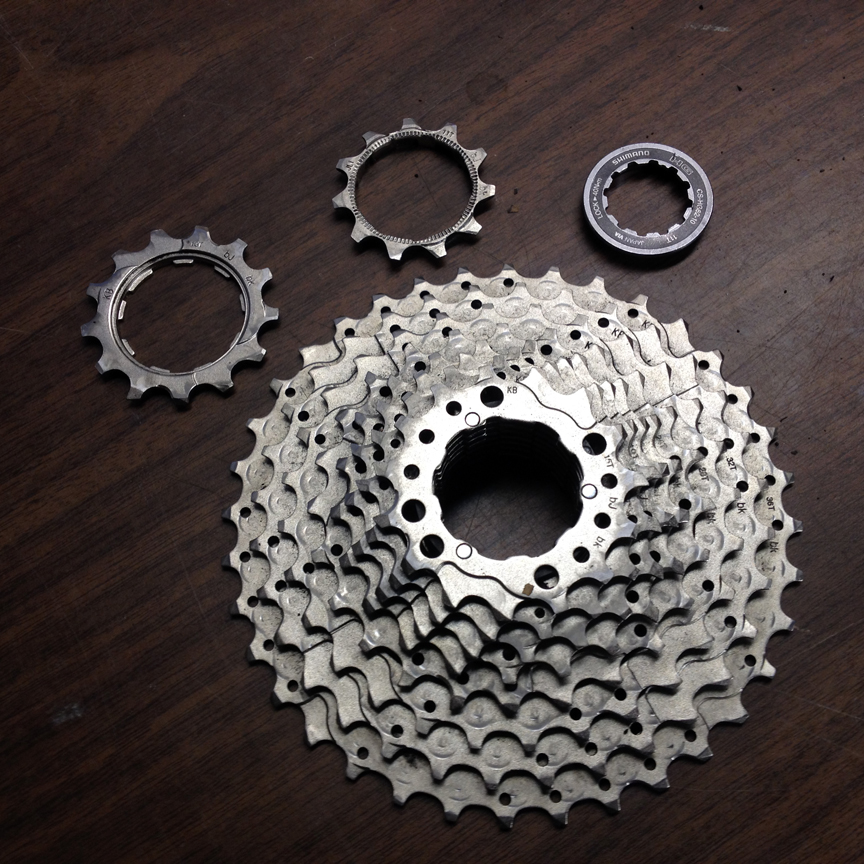
Disassembled rear cluster
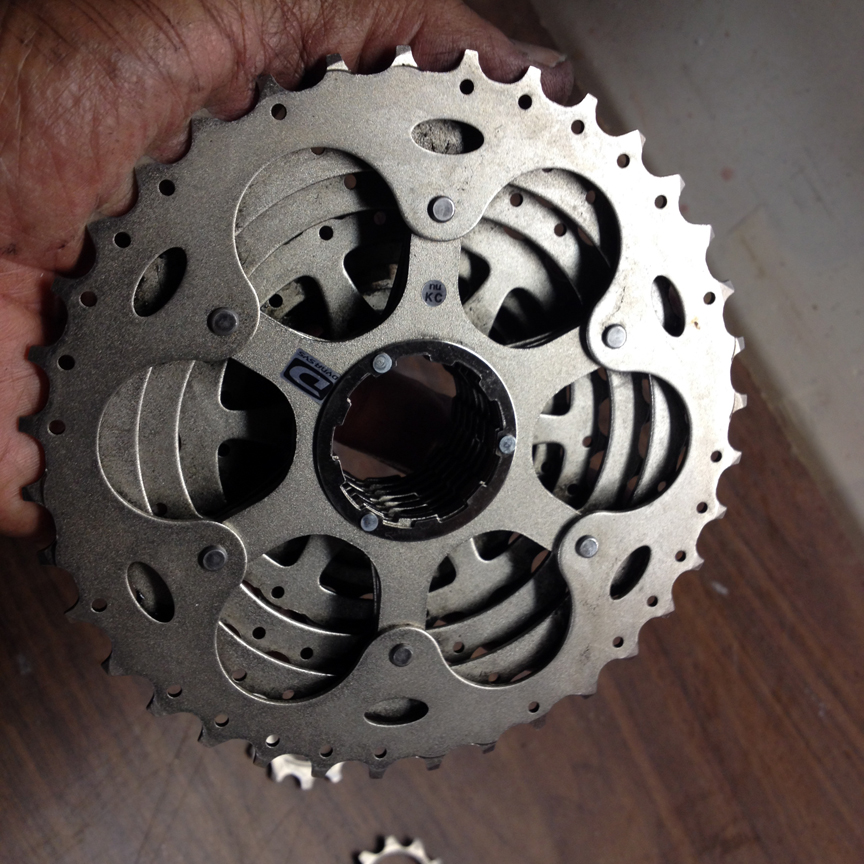
Cleaning the back of the cluster unit was a bit tedious.
I was very surprised to find that the first eight gears of the cluster were all riveted together into one unit. Only gears one and two were separate. I was a bit disappointed not to get the chance to ticker with separate gears and spacers. Also cleaning the eight gears as a unit was tedious. Removing the cluster was straight forward. There are plenty of excellent videos on YouTube that show you exactly what to do. Anyway, she’s back together and ready for my next ride.
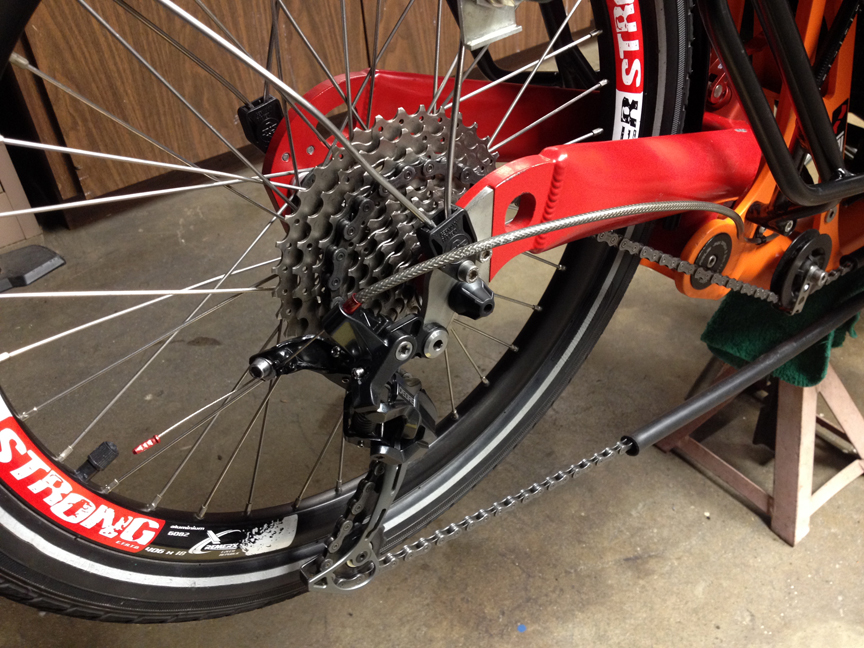
All back together and shiny.
Take care! Go Seahawks!